


A Step-by-Step Guide to Changing Car Glass 1
Change Car Glass 1
Introduction
Changing the glass of a car can be a daunting task, especially if you have never done it before. However, with the right tools and a little bit of patience, it is possible to replace the glass of different cars in the parking lot. In this article, we will guide you through the process of changing the glass of various car models, providing you with the necessary steps and precautions to ensure a successful replacement.
Before we dive into the details, it is important to understand the different types of car glass and their functions. The most common types of car glass include the windshield, side windows, and rear windows. The windshield is a critical component of the car’s structural integrity and provides protection against wind, dust, and debris. Side windows allow for visibility and ventilation, while rear windows serve as a rearview mirror and allow for a clear view of the road behind.
When it comes to replacing car glass, it is essential to have the right tools. Some of the tools you may need include a glass suction cup, a windshield removal tool, a rubber mallet, a utility knife, and a caulking gun. Additionally, you may also need safety equipment such as gloves, safety glasses, and a dust mask to protect yourself during the process.
Once you have gathered the necessary tools, the first step in replacing car glass is to remove the damaged glass. This can be done by using the windshield removal tool to carefully cut through the adhesive that holds the glass in place. It is important to exercise caution during this step to avoid damaging the surrounding body panels or interior components.
After removing the damaged glass, the next step is to clean the area thoroughly. This involves removing any remaining adhesive or debris from the frame to ensure a clean surface for the new glass to adhere to. A glass cleaner and a lint-free cloth can be used for this purpose.
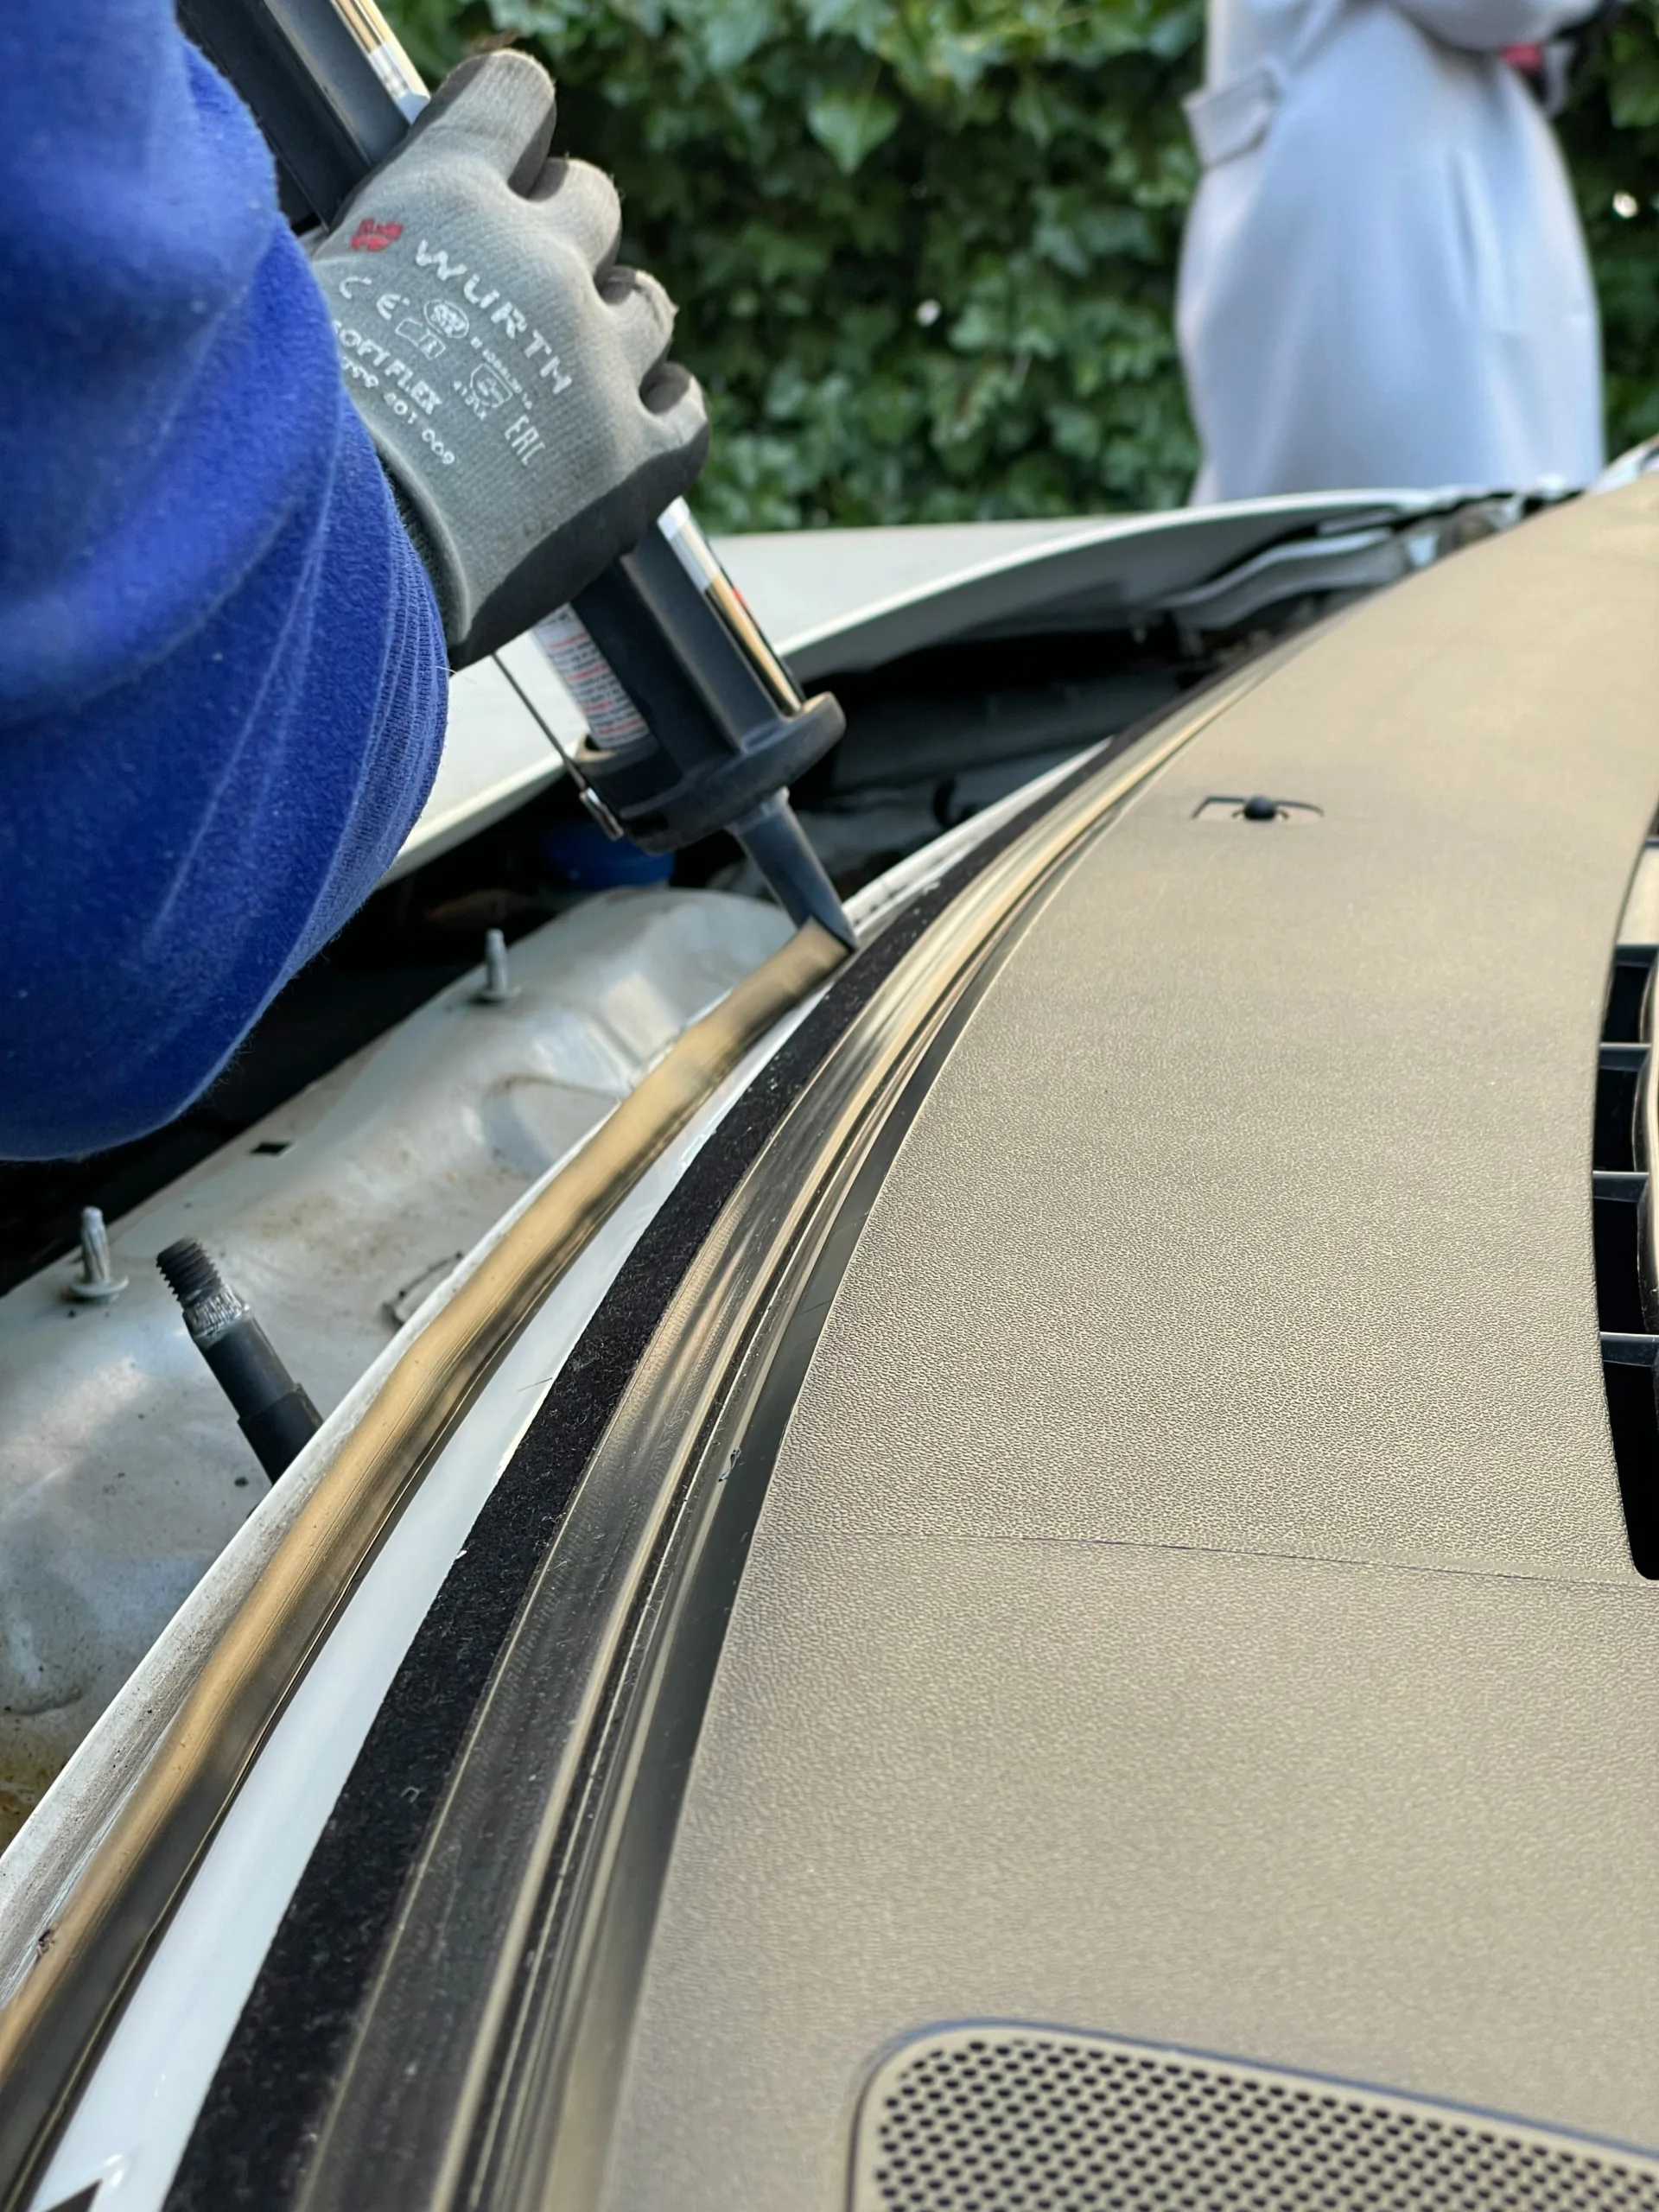
Once the area is clean, it is time to install the new glass. This can be done by applying a layer of adhesive to the frame using a caulking gun. The new glass can then be carefully positioned and pressed firmly against the adhesive. It is important to ensure that the glass is aligned properly and sits flush with the surrounding body panels.
After installing the new glass, it is crucial to allow sufficient time for the adhesive to cure. This typically takes around 24 hours, but it is advisable to check the manufacturer’s instructions for specific curing times. During this period, it is important to avoid driving the car or exposing it to extreme temperatures or excessive moisture.
In conclusion, changing the glass of a car may seem like a daunting task, but with the right tools and knowledge, it can be done successfully. By following the steps outlined in this article and taking the necessary precautions, you can replace the glass of various car models and ensure a safe and secure installation.
Gather the Required Tools
Before you begin, it is essential to gather all the necessary tools for the job. These tools may vary depending on the car model and the type of glass you need to replace. However, some common tools you might need include:
- Gloves: It is important to protect your hands while working on any car repair project. Gloves will not only keep your hands clean but also provide a layer of protection against any sharp edges or debris.
- Safety glasses: When working with glass, it is crucial to protect your eyes from any potential shards or fragments. Safety glasses will shield your eyes and prevent any accidents or injuries.
- Screwdriver set: A screwdriver set with various sizes and types of screwdrivers is essential for removing screws and fasteners that hold the glass in place. Make sure to have both flathead and Phillips head screwdrivers to accommodate different types of screws.
- Pliers: Pliers are versatile tools that can come in handy during the glass replacement process. They can be used to remove clips, trim pieces, or any other components that may obstruct the removal or installation of the glass.
- Gasket adhesive: Depending on the type of glass and the car model, you may need gasket adhesive to properly seal the new glass in place. This adhesive helps create a watertight seal and prevents any leaks or drafts.
- Glass cleaner: Before installing the new glass, it is important to clean the surface thoroughly. A glass cleaner specifically designed for automotive use will remove any dirt, grime, or adhesive residue, ensuring a clean and smooth surface for the new glass.
- Lint-free cloth: To achieve a streak-free finish, use a lint-free cloth to dry the glass after cleaning. This will ensure that no particles or fibers are left behind, giving you a clear and unobstructed view through the glass.
- Replacement glass: Finally, make sure you have the correct replacement glass for your car model. The size, shape, and specifications of the glass should match the original glass to ensure a proper fit and functionality.
By gathering all these tools beforehand, you can save time and ensure that you have everything you need to successfully replace the glass in your car. It is always better to be prepared and have all the necessary tools on hand to avoid any delays or complications during the process.
A Step-by-Step Guide to Changing Car Glass
Identify the Type of Glass
Before you start the replacement process, it is crucial to identify the type of glass you need to change. There are different types of car glass, including windshields, side windows, and rear windows. Each type requires a specific approach for replacement.
If you are unsure about the type of glass or the specific model of the car, consult the car’s manual or seek professional advice.
The windshield is the most critical piece of glass in a car as it provides structural support and protects passengers from external elements. It is typically made of laminated safety glass, which consists of two layers of glass with a layer of polyvinyl butyral (PVB) sandwiched in between. This design ensures that even if the glass shatters, it remains intact and prevents shards from flying into the cabin.
Side windows, on the other hand, are usually made of tempered glass. This type of glass is heated and then rapidly cooled during the manufacturing process, which makes it much stronger than regular glass. When it breaks, it shatters into small, dull pieces, reducing the risk of injury.
Rear windows can be made of either tempered or laminated glass, depending on the car’s make and model. Some vehicles even have rear windows with built-in defrosting elements to improve visibility during cold weather.
It is important to note that the glass used in cars is specifically designed to meet safety standards and provide optimal performance. Therefore, it is crucial to replace damaged or broken glass with the same type and quality to ensure the safety of the vehicle and its occupants.
If you are unsure about the specific type of glass required for your car, there are a few ways to find out. Firstly, you can consult the car’s manual, which often includes detailed information about the different types of glass used in the vehicle. Additionally, you can reach out to the car manufacturer or a professional glass replacement service for guidance.
Seeking professional advice is particularly important if you have a rare or vintage car, as finding the right type of glass may be more challenging. Experts in the field will have the knowledge and resources to help you locate the appropriate glass and ensure a proper replacement.
Replacing Windshields
The windshield is one of the most critical components of a car’s safety system. It provides structural support and protects the driver and passengers from external elements. Here are the steps to replace a windshield:
- Start by wearing gloves and safety glasses to protect yourself from any potential injuries.
- Remove any accessories or attachments on the windshield, such as rearview mirrors or wipers. This step is crucial as it allows for easier access to the windshield and prevents any damage to these components during the replacement process.
- Using a screwdriver or pliers, carefully remove the trim and molding around the windshield. This step requires precision and caution to avoid any scratches or dents on the vehicle’s body.
- Once the trim is removed, cut the sealant that holds the windshield in place using a utility knife or a windshield removal tool. This step requires steady hands and patience to ensure that the sealant is cut cleanly without damaging the windshield or the frame.
- With the help of an assistant, carefully lift the old windshield out of the car. It is important to have an extra set of hands to support the weight of the windshield and prevent any accidents or injuries.
- Clean the windshield frame thoroughly with glass cleaner and a lint-free cloth. This step ensures that the frame is free from any dirt, debris, or old adhesive, which can affect the proper installation of the new windshield.
- Apply a layer of gasket adhesive around the frame to create a seal for the new windshield. The gasket adhesive helps to secure the windshield in place and prevents any water or air leaks that can compromise the structural integrity of the vehicle.
- Place the new windshield into the frame, ensuring it is centered and aligned correctly. This step requires precision and attention to detail to ensure that the windshield fits perfectly into the frame without any gaps or misalignments.
- Press the windshield firmly into place to ensure a proper bond with the adhesive. Applying even pressure across the entire surface of the windshield helps to create a strong bond between the windshield and the frame, ensuring its stability and durability.
- Replace the trim and molding, making sure they are securely attached. The trim and molding not only enhance the aesthetic appeal of the vehicle but also provide additional protection and support to the windshield.
- Allow the adhesive to dry completely before driving the car. This step is crucial as driving the car before the adhesive has fully cured can compromise the bond between the windshield and the frame, leading to potential safety hazards.
Replacing a windshield requires careful attention to detail and adherence to safety precautions. By following these steps, you can ensure a successful windshield replacement that restores the structural integrity and safety of your vehicle. Remember to consult a professional if you are unsure or uncomfortable performing this task yourself.
Replacing Side Windows
Side windows are relatively easier to replace compared to windshields. However, it is still important to follow the correct procedure to ensure a proper fit. Here are the steps to replace a side window:
- Put on gloves and safety glasses before starting the replacement process.
- Remove the door panel by unscrewing any visible screws and gently prying off the panel using a trim removal tool.
- Locate the window regulator and remove it carefully to access the glass.
- Using a screwdriver or pliers, remove any clips or brackets holding the old glass in place.
- Once the old glass is removed, clean the window track and frame with a lint-free cloth.
- Apply a thin layer of gasket adhesive around the window frame.
- Insert the new window glass into the frame, ensuring it fits securely.
- Reattach the clips or brackets to hold the glass in place.
- Test the window by rolling it up and down to check for smooth operation.
- Replace the door panel and secure it with screws.
It is important to note that the process of replacing a side window may vary slightly depending on the make and model of the vehicle. Some vehicles may require additional steps or tools to complete the replacement. It is always recommended to consult the vehicle’s manual or seek professional assistance if you are unsure about any aspect of the replacement process.
Additionally, it is crucial to choose the correct replacement glass for your vehicle. Side windows come in different shapes and sizes, so it is essential to match the specifications of the old glass with the new one. This ensures a proper fit and prevents any issues with the window’s functionality.
When handling the glass, it is important to exercise caution and wear protective gloves and safety glasses. Broken glass can cause injuries, so it is crucial to handle it with care and dispose of it properly. If you are unsure about how to handle the broken glass safely, it is best to seek professional assistance.
Overall, replacing a side window can be a relatively straightforward process if you follow the correct steps and take necessary precautions. By doing so, you can ensure a proper fit and restore the functionality of your vehicle’s side window.
Replacing Rear Windows
car glass replacement 1
Replacing a rear window can be more challenging due to its size and location. However, with the right approach, it is still possible to replace it successfully. Here are the steps to replace a rear window:
- Wear gloves and safety glasses before starting the replacement process.
- Remove any trim or molding around the rear window using a screwdriver or trim removal tool.
- Using a utility knife or a windshield removal tool, cut through the sealant holding the rear window in place.
- With the help of an assistant, carefully lift the old window out of the car.
- Thoroughly clean the window frame using glass cleaner and a lint-free cloth.
- Apply a layer of gasket adhesive around the frame to create a seal for the new window.
- Place the new rear window into the frame, ensuring it is centered and aligned correctly.
- Press the window firmly into place to ensure a proper bond with the adhesive.
- Replace the trim and molding, making sure they are securely attached.
- Allow the adhesive to dry completely before driving the car.
It is important to note that the process of replacing a rear window may vary depending on the make and model of the vehicle. Some vehicles may have additional steps or require specialized tools. Therefore, it is recommended to consult the vehicle’s manual or seek professional assistance if you are unsure about any aspect of the replacement process.
Additionally, it is crucial to take proper safety precautions when working with glass and adhesive. The use of gloves and safety glasses is essential to protect yourself from any potential injuries. It is also important to handle the glass with care to avoid any breakage or damage.
Furthermore, when applying the gasket adhesive, it is crucial to follow the manufacturer’s instructions and ensure an even and consistent application. This will help create a strong and durable seal for the new window.
After the replacement is complete, it is recommended to allow the adhesive to dry completely before driving the car. This will ensure that the window is securely bonded to the frame and prevent any potential leaks or damage.
By following these steps and taking the necessary precautions, you can successfully replace a rear window and restore the functionality and aesthetics of your vehicle.
Change Car Glass 1
windshield replacement
S:a